
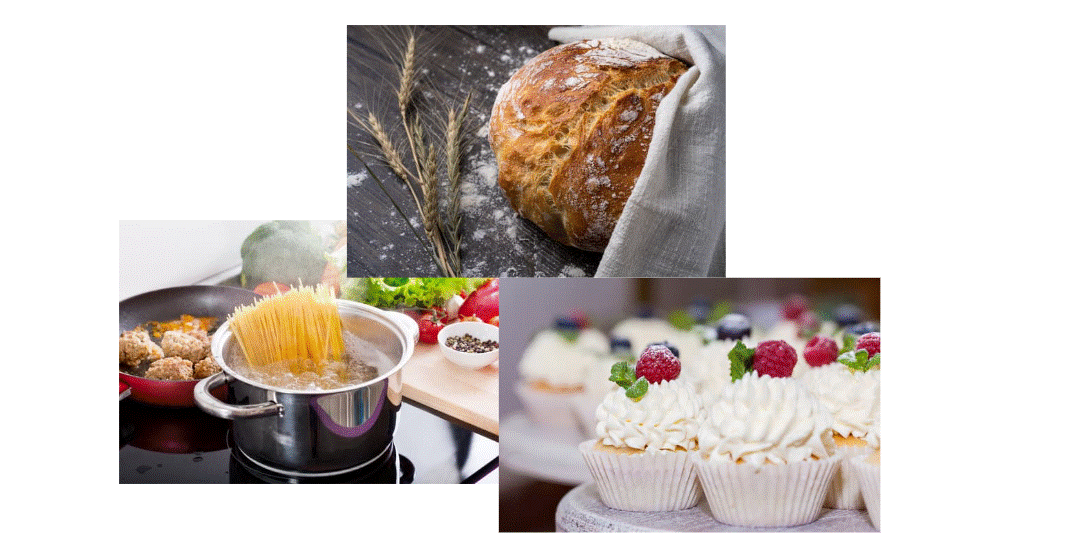
High Altitude Baking & Cooking Tips
Master the art of cooking and baking at elevation with expert guidance and practical strategies.
Why Elevation Changes Everything in Your Kitchen
At higher elevations, lower air pressure affects boiling points, gas expansion, and moisture loss.
Recipes designed for sea level often need adjustments for baking and cooking success at altitude
High Altitude Baking Tips
Baking is the area where altitude is most unforgiving
Because baking relies on precise chemical reactions and structural integrity, even a small change in atmospheric pressure can lead to a "cake-tastrophe."
Understand the "Flash-Rise"
The most common issue is that baked goods rise too quickly. With less air pressure to hold back the gases produced by yeast or leavening agents, the air bubbles in your batter expand rapidly. If the structure (the flour and eggs) hasn't had time to set, those bubbles will burst, causing the cake or bread to collapse.
The Fix: You must slow down the rise and speed up the set. This is usually achieved by increasing the oven temperature and decreasing the amount of leavening.
The Dryness Dilemma
High-altitude air is notoriously dry. Flour stored in the mountains has a lower moisture content than flour at sea level. This means your dry ingredients will soak up more of your wet ingredients than the recipe intended.
The Fix: Always store your flour in airtight containers. When baking, you may need to add a splash more liquid (water, milk, or an extra egg) to compensate for the thirsty grains.
Watch the Clock, Not the Timer
Because you are often baking at higher temperatures to set the structure quickly, your items will finish faster. A cake that takes 30 minutes at sea level might be done in 22–25 minutes at 6,000 feet.
The Fix: Start checking for doneness when about 75% of the suggested baking time has elapsed.
Looking for more Baking Tips? Check out our High Altitude Baking page.
High Altitude Cooking Tips
While baking gets most of the attention, everyday cooking changes significantly at altitude as well.
The primary culprit here is the boiling point of water
The Temperature Gap
At sea level, water boils at 212°F For every 500-foot increase in elevation, the boiling point drops by about 1°F. By the time you reach 5,000 feet, water boils at roughly 203°F. At 10,000 feet, it’s down to 194°F.
This means that boiling water is literally less hot at high altitude. This affects everything from pasta to braised meats.
Pasta and Grains: Because the water isn't as hot, pasta and rice will take longer to cook. Al Dente requires a few extra minutes of patience.
Boiling Eggs: A 3-minute egg is a myth in the mountains. You will need to add 1–2 minutes to your soft and hard-boiled egg timers to reach the desired consistency.
Evaporation and Concentration
Because water boils at a lower temperature, it also turns into steam more easily. This causes liquids in soups, stews, and sauces to evaporate much faster.
The Fix: Keep a lid on your pots to retain moisture. If you are reducing a sauce, be careful—it can go from just right to burnt or too salty faster than you’d expect because the flavors concentrate more quickly as the water vanishes.
Want more cooking Tip? Check out our High Altitude Cooking page.
Ingredient Adjustments at High Altitude
Adapting a sea-level recipe requires a balanced approach.
You cannot simply change one ingredient and expect perfection; you may need to adjust different components of the dish.
Leavening Agents (Baking Powder & Soda)
This is the most critical adjustment for cakes and muffins. At high altitudes, you need less lift because the air isn't pushing back.
3,000 ft: Reduce by 1/8.
5,000 ft: Reduce by 1/8 to 1/4.
7,000+ ft: Reduce by 1/4 to 1/2.
Sugar
Sugar is a tenderizer that weakens gluten. Since the structure is already under stress at altitude, too much sugar can cause a collapse. Additionally, as moisture evaporates, the sugar concentration increases.
The Fix: Reduce sugar by 1 to 3 tablespoons per cup. This helps the structure stay strong and prevents a gummy texture.
Flour and Eggs
These are your strengtheners.
Flour: Adding 1–2 tablespoons of flour per recipe provides more gluten to hold the rise.
Eggs: Adding an extra egg (or an extra egg white) provides more protein for structure and more liquid for hydration. This is especially helpful for boxed mixes.
Liquids
Add 1–4 tablespoons of extra liquid (water or milk) per cup to combat the dry environment and the lower boiling point.
Flour, sugar, eggs, and liquids all behave differently. Learn substitutions, measurements, and common mistakes to avoid when baking and cooking at elevation.
Solve Common High Altitude Challenges
Even the most experienced mountain chefs run into these recurring frustrations.
Here is how to troubleshoot the most common altitude fails.
My Cookies Spread into One Giant Sheet
The Cause: The butter melts before the structure sets, or there is too much sugar.
The Solution:
Chill the dough: Cold fat takes longer to melt.
Increase the heat: Bake at 375°F instead of 350°F.
Use more flour: Add 2 tablespoons of flour to give the cookie more lift.
My Bread Rises and Then Collapses
The Cause: Over-proofing. Yeast loves high altitude and works double-time.
The Solution:
Reduce Yeast: Use about 25% less yeast than the recipe calls for.
The Finger-Poke Test: Don't wait for the dough to double in size. If you poke the dough and the indentation stays, it’s ready for the oven, regardless of the time elapsed.
Crunchy Pasta and Undercooked Grains
The Cause: This is the most common challenge. Because water boils at a lower temperature (e.g., 202°F/94°C in Denver vs. 212°F/100°C at the beach), your food is essentially simmering in cooler water. The starch granules in pasta and the tough outer bran of grains like brown rice require higher heat or longer exposure to soften.
The Solution:
Increase Cook Time: Expect pasta to take 2–5 minutes longer than the package's al dente time suggestion. For brown rice or farro, you may need to add 10–15 minutes to the total cook time.
Add More Water: Because you are boiling the water longer, more of it will evaporate. Start with an extra 1/2 cup of water for every cup of rice or grains to ensure the pot doesn't go dry before the grain is tender.
Pre-Soak: For stubborn grains like wild rice or quinoa, soak them in warm water for 30 minutes before cooking. This hydrates the outer shell, allowing the lower-temperature boiling water to penetrate the center faster.
Beans and Potatoes Won’t Get Soft
The Cause: The lower boiling point of water prevents the starches and fibers from breaking down.
The Solution:
The Pressure Cooker: This is the ultimate kitchen tool for high altitude. It forces the temperature of the water higher by creating artificial pressure.
Pre-soaking: Always soak beans overnight to give them a head start on hydration.
Essential Kitchen Tools for High Altitude Cooking & Baking
To succeed at elevation, your standard kitchen kit needs a few specific upgrades. These tools help take the guesswork out of the atmospheric changes.
1. Pressure Cooker (Instant Pot)
At high altitude, a pressure cooker is a necessity, not a luxury. By sealing the chamber, it creates a high-pressure environment that raises the boiling point of water back up to (and beyond) sea-level temperatures. It is the only way to cook dry beans or tough cuts of meat in a reasonable amount of time.
Because the air is dry, flour can become very densely packed in a measuring cup, or it can be overly aerated. Measuring by weight (grams) ensures that you are getting the exact amount of protein your recipe needs.
3. High-Quality Oven Thermometer
Most ovens are off by 5° to 10°. At high altitude, where we are intentionally raising temperatures to 365°F/185°C or 375°F/191°C to set structures, being off by 10° can mean the difference between a perfect cake and a burnt one.
4. Instant-Read Probe Thermometer
Don't rely on golden brown exteriors as a sign of doneness. Because of the higher oven temps, the outside of your food will brown before the inside is cooked. Use a thermometer to check internal temps.
Use thermometers, pressure cookers, mixers, and baking stones for consistent results. Find trusted recommendations in our guides and recipes.
Master High Altitude Cooking & Baking Today!
Living at altitude doesn't mean you have to settle for mediocre food. By understanding that you are operating in a low-pressure, low-moisture world, you can begin to manipulate your environment to produce professional results.
The High Altitude Mountain Baker's Golden Rule
Change one thing at a time. If a recipe fails, don't change the sugar, the flour, the eggs, and the temperature all at once. Start with the leavening. If that doesn't work, try the temperature.
If you still need a recipe that has already been adjusted, check out our High Altitude Recipes.
Explore More High-Altitude Kitchen Tips
Looking for more guidance? Start here:
Altitude Affects More Than Your Kitchen
From how bread rises to how your body hydrates, elevation changes everything.
Explore more resources below:
New to life at elevation?
GRAB OUR FREE RESOURCE GUIDE BELOW:
Living at High-Altitude Resource Guide | Baking, Gardening, and Thriving Above the Clouds